I really like that still life shots that have snow into, or that lovely snowy homemade globe. because I'm living in a place that never snows so I searched around Pinterest.com about how to make a fake snow! And I found an easy way, here's how ;
Materials: - Baking Soda - Water - Fork -Bowl
Put the amount you want of baking soda in a bowl and add few drops of water and mix them using the fork add more water if the snow not formed yet, If it turned watery add more baking soda. when you're done of mixing put it into the fridge for few minutes only. Now Enjoy your snow !!
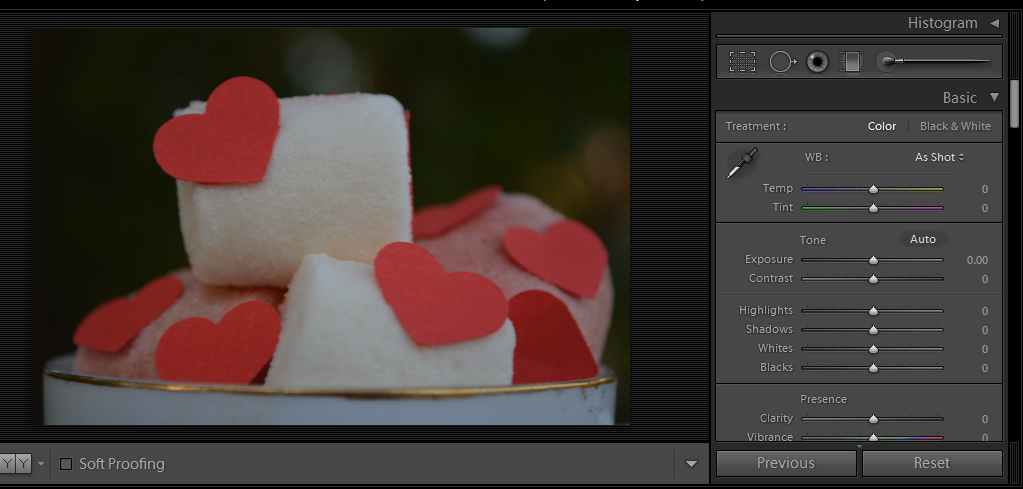
Why I always Shoot Raw ? and here's one of the reasons; because I'm not always having a good lightening source so shooting RAW give me ability to fix my shots later on Lightroom and bring back details into the dark areas and lighten my shots by increasing exposure unlike JEPG images that has very limited range of flexibility.
The video below showing how I turned a dark Shot into a good lightened image.
" It's not a tutorial video " but I hope it would be helpful !
Since we're publishing our art everywhere on web and can't control who can use it, and no one like to see his/her photo being claimed as others work. Watermark or copyrights help a little to prevent others from stealing your efforts, or at least make it difficult for them to erase your name. I found many ways to add a watermark and I'll list few for you to try them out !
Method 1 : Text tool Watermark in Photoshop Method 2 : Brush Watermark in Photoshop Method 3 : Plug-in Watermark in Photoshop
DETAILS
Method 1 : Text Tool
Step 1 : Choose Text Tool ( T )
Step 2 : Pick your favorite font and start typing your watermark
Step 3 : You can re-position and re-size your mark by the Move tool
Step 4 : Decrease Opacity to make a transparent watermark
Method 2 : Brush Watermark
Step 1 : Open Photoshop then go to " File > New "
Step 2 : Select the below setting for your new project then click "OK": Width: 1000 Pixels Height: 1000 Pixels Res : 300 Pixel/Inch Background : Transparent
Step 3 : With text tool ( T ) and after choosing your font write down your text
For adding another text below or somewhere first click on the check mark [✓]
Then while you still using the text tool click where you want to type another text.
after you're done click on the check mark again [✓]
Step 4 : Choose the crop tool
Select your text
Then click the check mark [✓] or press " Enter " on keyboard
Step 5 : Go to " Edit > Define Brush Preset "
Then name your watermark and click OK
Now your Bush is ready to use !
Step 6 : Open your image then click on brush tool
Right click anywhere on your photo and go down to the end of your brushes you will find your new brush, click on
Change opacity by the slider above the image
Or by the Opacity slider above layers, while you're selecting the watermark layer.
And you can change the color of the watermark
resize your brush and click on the image where you want your watermark to be
Method 3 : Watermark Plug-in
I recently found a helpful watermark plug-in from Russell Brown. [Download Link] ٍScroll down into Russell Brown site you'll find a link of tutorial video beside " Adobe Watermark Panel 2.2.2 " I still didn't use it but it's easy, download it and start discovering. BTW it's FREE
Adobe Photoshop Lightroomis a great software for photographers to start with, and a good start point to turn over your photos from a pale and flat to a perfectly edited with only few basic tools.
Lightroom can do more than just basic color correction, you can turn photos into dramatic ones.
I use Lightroom with almost every photo before I export it to Photoshop.
Anyways, Let's do these few steps to turn over your photo;
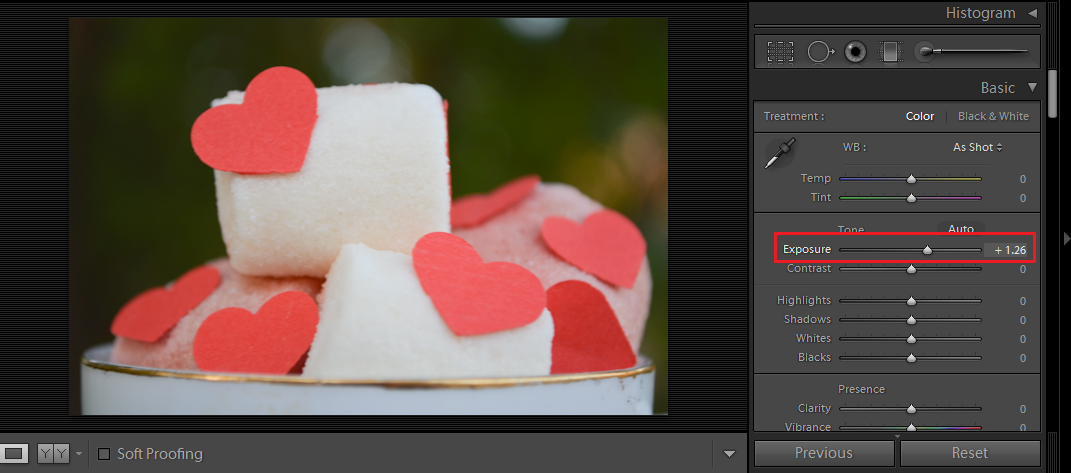
Into the " Develop " section you gonna find " Basic " Panel, do the following ;
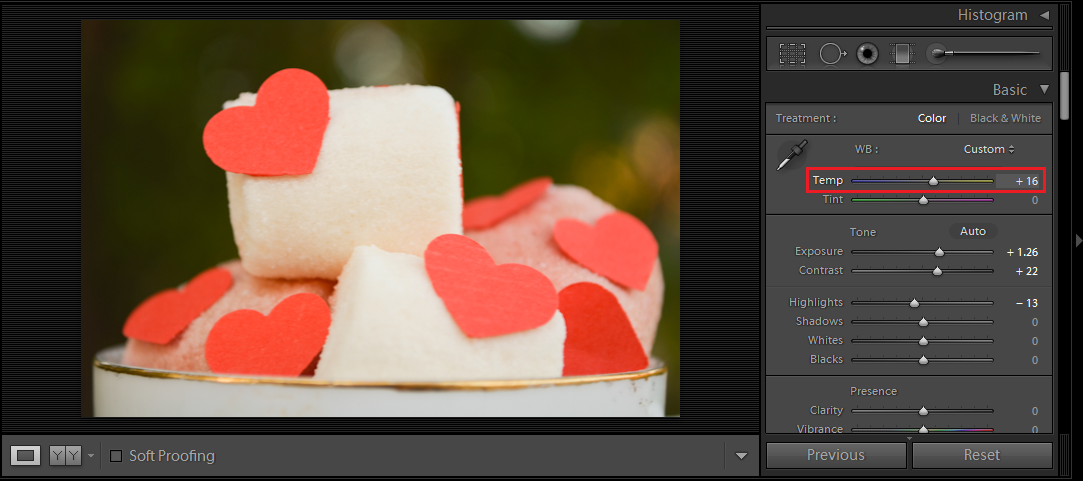
Step 1 : Exposure increase to give your image more light. for below photo i preferred +1.26
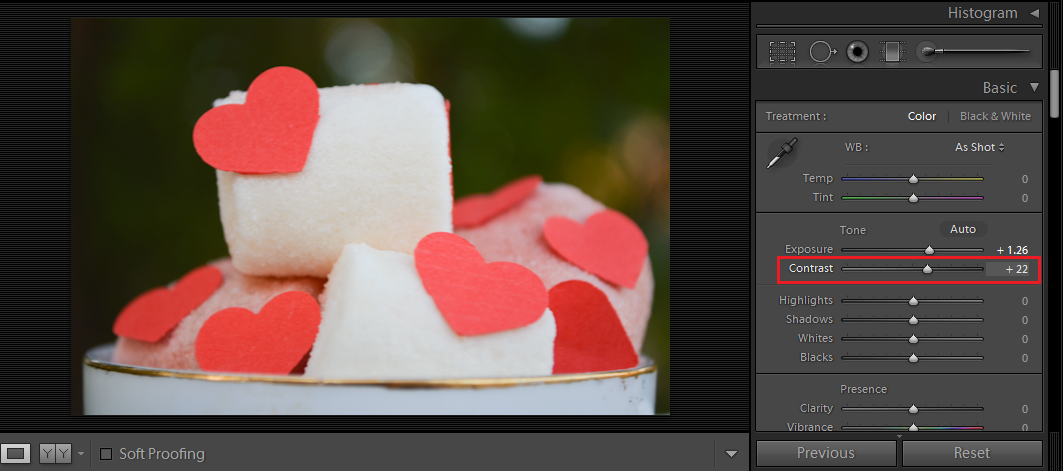
Step 2 : Contrast
Increase a bit, for me I don't like the black areas to be so black but I like the photo to be well contrasted. +22
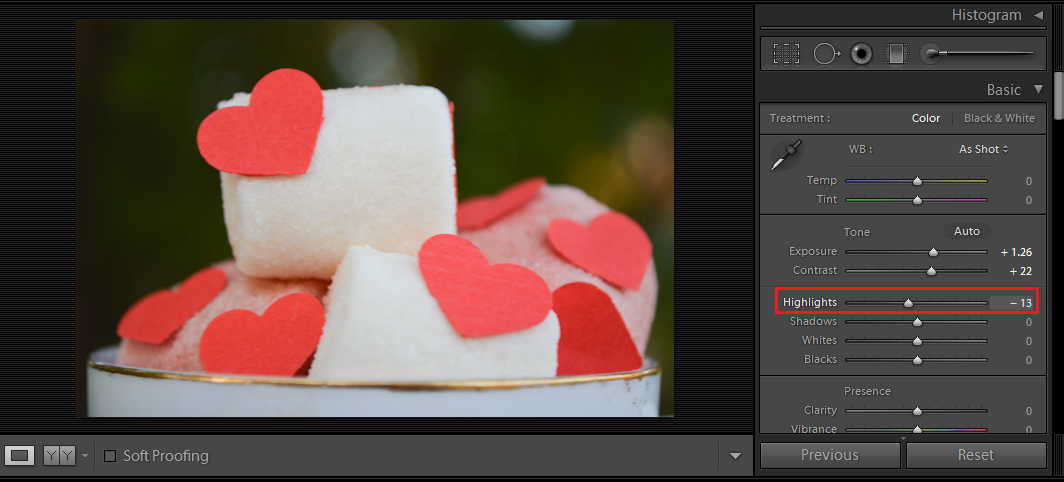
Step 3 : Highlights
For the highlighted area. sometimes highlights kills details, so my settings is -13 .
Step 4 : Temp (temperature ) To add warmness (yellowish) or coldness (bluish ). I added warm tune +16
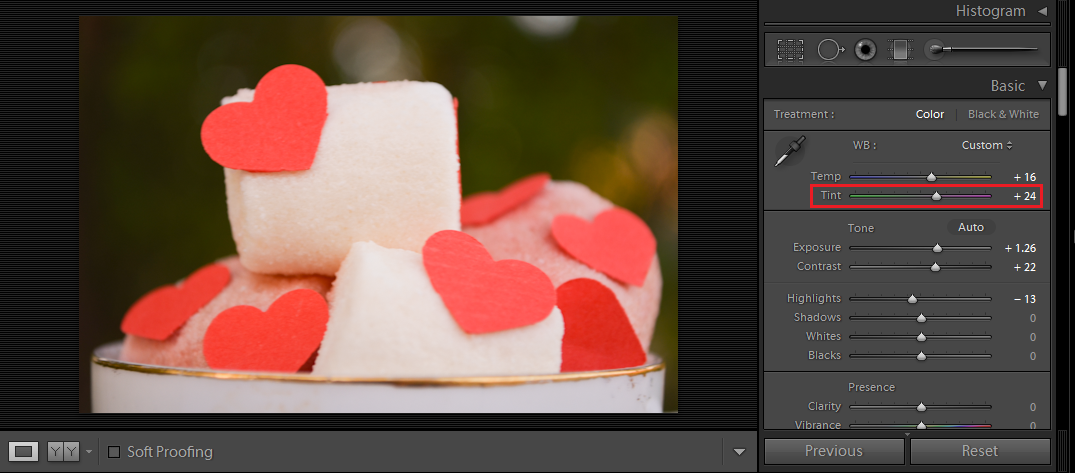
Step 5 : Tent
When ever I add warmness to the image I increase tent a bit because I feel it turns a bit greenish so increasing tent add a bit red tone. +24
Just take a deep breath and do the following : Think with yourself " I like photography, but what's my favorite photography type? landscapes? portraits? macro? still life? or other types?where I can find myself within all types of photography ?" *Photo by Brenda Waworga
Go to Google search and type down "photography"then scroll and watch the photos to see what is the type interests you most ! *Photo by Kendell
open the picture which attracted you take a deep look on the photo. and ask yourself the following questions: *Photo by Francesca
Why I liked that type of photography? what is special about this photo? what does it contain? What lights source been used ? what camera settings could be used? What filters and affects added?For example:
If we got this photo, let's answer the questions together;I liked that type of photography because I like nature, especially flowers. the special about this photo is the soft pink tone, I like pink.it's contain, a group of pretty pink flowers, part of green tree, and the sky. . camera settings properly was +60 shutter speed, ISO 100 ( because there is enough light)it's might used simple color correction with a slight pink tone.
after that get yourself inspired to snap similar shots, go to search again type " flowers photography " or the type you like
Train your photography eye, this is really important!always watch some photos. *Photo by Kim Partridge Do this everyday for at least few minutes, and see how your photography eye get better and better !
try over and over. it's not stealing someone's else ideas it's just for training your vision to introduce shots similar to the ones you always dreamed of.