Showing posts with label DIY. Show all posts

DIY Door Macrame Curtain


     Recently I was thinking to buy a room divider curtain for my little kitchen, as a decor and for a little privacy or to isolate because one of the two kitchen doors  is in front of our apartment door.
So I found a pretty macrame curtains on Pinterest and I fall in love with them, I showed them to my husband to check if he would like that style and he liked them too "yaay"

     At this point I started looking for a good tutorial and I found it. I watched this video of Elizabeth JJ first " Macrame curtain : Testing Pinterest DIY Pin" where she was following another tutorial From " A Beautiful Mess "

however, I collected all supplies needed, It took a little search first, we went to Home Depot to look for %100 a cotton rope because we didn't want a shiny rope which is polyester, they still look nice but we wanted a matte, not pure white rope, and we didn't find there, so I looked a round Amazon and finally found exactly what we wanted and at a good price too ( $5 for each 100 ft ).
 
   To find the beads it was a tricky thing too because you have to make sure the bead hole fit the robe not bigger so it will not slip down and not smaller either . Me and my husband searched a lot in Amazon, home depot and Walmart but finally we found a good looking brown beads at Amazon with a hole (4/16" inch ) almost same size as rope (3/16")


So here how I did my Macrame Curtain

Materials I Used :

  • 100% Cotton Rope 300 ft ( 3/16 Inch ) from Amazon for $16.41 ( 100 ft for $5.47)
  • Round Wood Dowel 3 ft (3/4 Inch ) from Home Depot for $4.75 ( as I remember)
  • Brown Round Beads 6/8 Inch ( 18 mm ) From Amazon 100pcs for $10.99 I used 108 beads
  • 2 Hooks 
  • Pen
  • Measurement Tape
  • Scissors.
  • Tape


Estimate Cost : $32.15


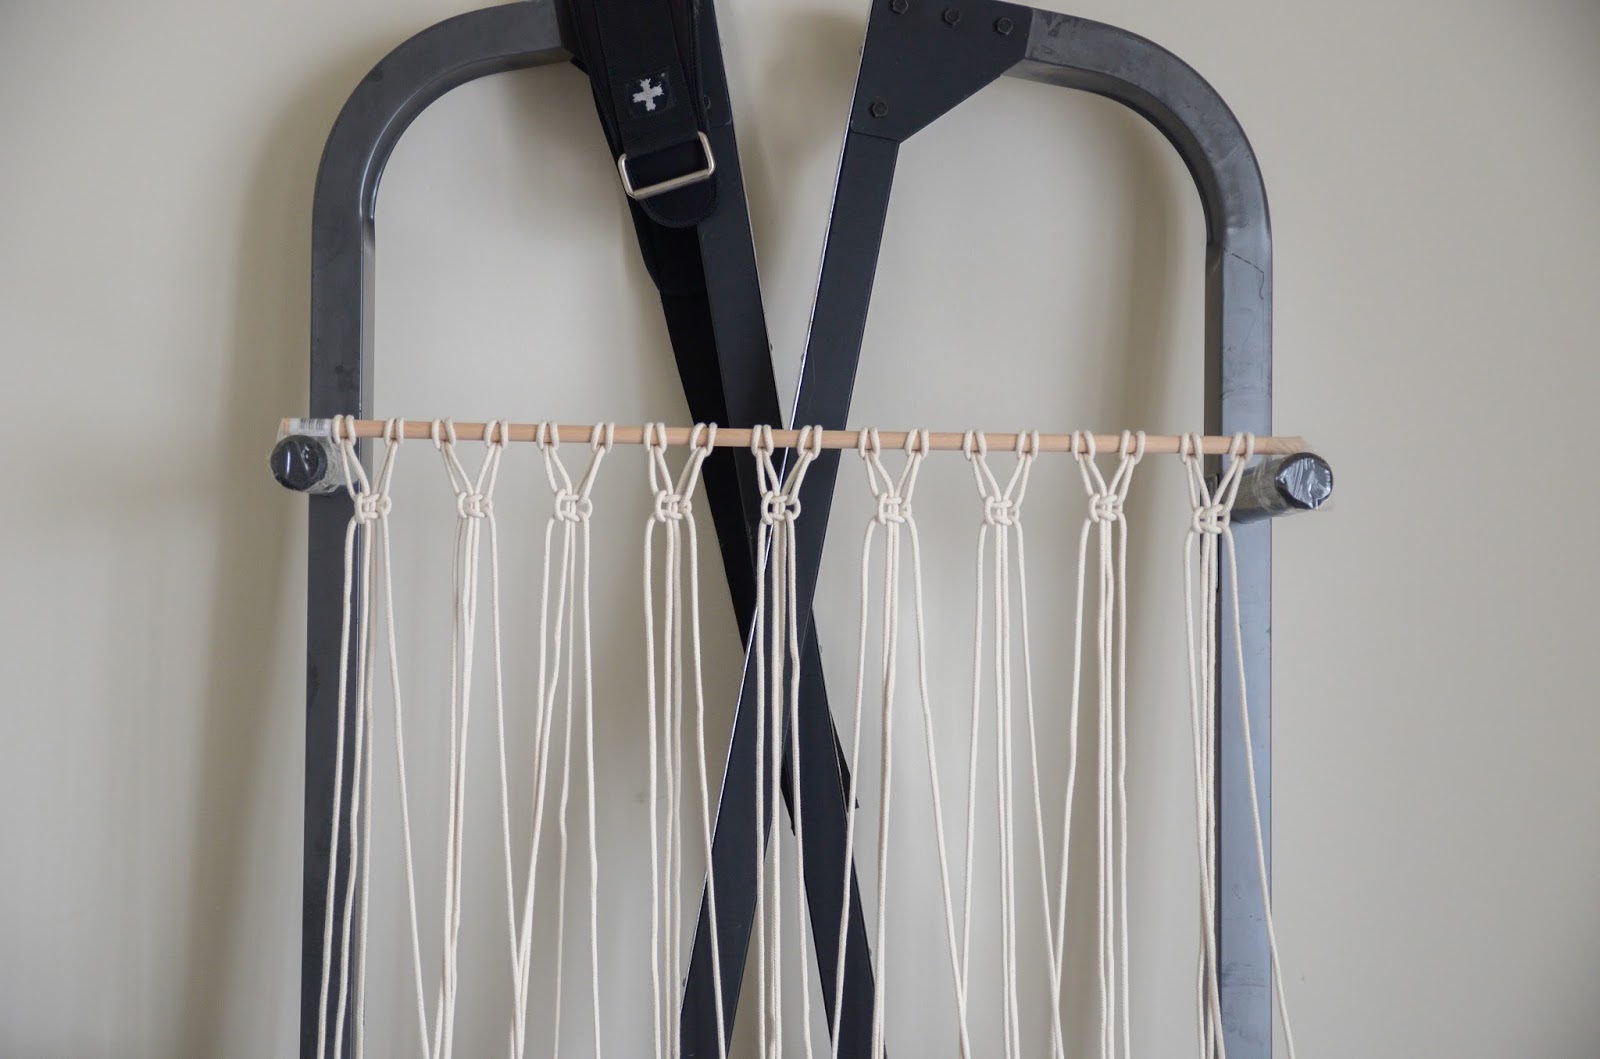
After measuring your rope, I cut out 18 rope, each is 200 inch, folded up around dowel to be 36 rope 100 inch.  then my husband offered his "home gym" to hang the dowel on and tape it for me so it will stick in place.


Using the pin and marked where ropes should placed with about 1.50 inch in between. you can make ropes closer but in this case you will need more extra ropes.


For the knot, check Elizabeth Video tutorial, was so helpful ! I was repeating her method " Over Over Under, Under Under Over"  


Taped the end of each rope so it will be easier to get beads through.


Adding beads can add weight to ropes.

 Knotted the ends and cut off the extra.

  TA-DA !!


I'm thinking of adding more ropes to this curtain in the future, but I'm happy with it now.

Thanks for passing by!

How to make a Fake Snow ?


I really like that still life shots that have snow into, or that lovely snowy homemade globe. because I'm living in a place that never snows so I searched around Pinterest.com about how to make a fake snow! And I found an easy way, here's how ;

Materials:
- Baking Soda
- Water
- Fork
-Bowl

Put the amount you want of baking soda in a bowl and add few drops of water and mix them using the fork add more water if the snow not formed yet,
If it turned watery add more baking soda.
when you're done of mixing put it into the fridge for few minutes only.
Now Enjoy your snow !!

Here's my Snow
It's look like a real snow right?

DIY Photos Album


Hi everyone everywhere in the world
Today's post is about the Album I made for my little cousin " Sana" as a birthday gift, I'll post about her later,   so now I'll show how I did it :) 


Bye :)

Mother's Day Card

Hi to all the Mothers around the world

So today is Mother's Day..days before, my friend in Malaysia " Latifa" asked me to do a Mother's day card for her mom. So I started working on 9th may morning at 10  and I finished it almost at 2 pm, I had lunch in between, so you can say it took 3 hours to be finished.

Now I'll show you the card:

The Front Cover
I got problem when I tried to cut the letters :D


The " I love U " would drop down when you open the card


This sheet is to write something for your mother


Happy Mother's Day


DIY Tree Jewelry Organizer

Hi again

Yesterday I went to our garden which I often go when I want to photograph something " Our garden is the only nature space I got to photograph :/" but this time I went there without my camera.
I roamed around and I get inspired to do things.
I collected some tree branches, wood and chicken feathers, and I found a small table which is properly made by my grandpa. And I decided to do some DIY with these things.

Anyways here's what I did, I did a tree jewelry organizer.

Materials: 
- tree branches " good shaped "
-  plants pot. " you can use food can maybe or Tomato paste can "
- plants dust or sand.
- digging tool " or even a spoon works"
- any decoration you want.


I gathered dust and put some then I put the tree after that I added the rest of the dust, you can use rock upon the dust so the tree will not falls down. and you can decorate the pot as you wish. I didn't decorate it yet. Now hung your Jewelry and enjoy !

I guess later I will use this tree for something else, if I did, I will post about.


See Ya


DIY Of Last Week

Hello Everyone
As I'm boring so I was doing some crafting from time to time last week, I photographed some. Let's go talk about each one
;)

1- DIY Key Necklace
all You need here is " key of meat can & nail polish of your choice"  later I decided to add the red ribbon.
just polish it and wait till it dry and then Ta Da you can wear it ! 

2- DIY Colorful Keys
You need " your keys & nial polishes"
Polish and wait then USE ;) That's it.


3- DIY Palette Brush
Materials :
* Box " I used cookies box"
* Ribbon
* glue Gun
* Scissors
Now Start :
First put the ribbon on the cover of the box, and leave a little space in the middle between the cover and ribbon so you can get your hand between, as it's shown in the second picture below " I don't know how to explain this in a simple word :D" then cut and glue, That's it
;)  I guess the pictures are clear no need to explain a lot. 


4- DIY pistachio Shells Flower
Now I'm Lazy to talk :D
Watch below

See Ya :)


Day Full Of Crafting


Hi

Yesterday I was busy doing things " Bracelets, Dreamcatcher & Card "
 I will not talk a lot now because there are a lot of Photos here :D " I took the photos with my Nikon and My Sony cellphone" , I'll just leave you with the pictures. Enjoy !


" Card "

I Made it for my Friend Fairooz' Birthday


" Dreamcatcher "

It made also for Fairooz  :)


" Bracelets "

I made five and one of them I gave it to Fairooz


I bring all the materials that I may need and started .... " But this photo taken just after I finished doing them :D "


This on was given to Fairooz


 I guess that's it :) 
B Bye